How to Set Up Your Loyalty Program
Quick Start Guide · KNISTR Loyalty for Shopify
Overview
A well-designed loyalty program turns one-time buyers into regulars — and regulars into brand advocates. This guide walks you through launching your first points-based program in under 30 minutes.
What you'll have at the end:
- A live loyalty program with earning rules and rewards
- A branded widget visible in your store
- Automated customer emails ready to go
:::info Estimated setup time 20–30 minutes :::
Before You Start
Who this guide is for:
- Shopify merchants setting up a loyalty program for the first time
- Store owners who want to increase repeat purchases and customer lifetime value
What you'll need:
- A Shopify store (any plan)
- Admin access to install apps
- ~30 minutes of focused setup time
How KNISTR Works
KNISTR is built around a points-based loyalty program — the most widely used and easiest-to-understand model in e-commerce.
| Step | What happens |
|---|---|
| Customer takes an action | Makes a purchase, signs up, shares birthday |
| Customer earns points | Based on your earning rules |
| Customer redeems points | For discounts, free shipping, or gifts |
Example program:
"Earn 1 point for every €1 spent. Redeem 100 points for €10 off."
Step 0 — Define Your Program Goal
:::warning Don't skip this step A loyalty program without a clear goal consistently underperforms. Your goal determines which earning rules and rewards to activate. :::
Choose your primary goal before touching any settings:
Goal A: Increase Repeat Purchases
Encourage customers to come back and buy again.
Setup recommendation:
- Reward every purchase with points
- Offer rewards customers can realistically reach within 2–3 orders
Goal B: Increase Average Order Value (AOV)
Encourage customers to spend more per order.
Setup recommendation:
- Set higher point thresholds for premium rewards
- Add in-store messaging: "Spend €20 more to earn your next reward"
Goal C: Grow Customer Base & Engagement
Keep customers interacting with your brand between purchases.
Setup recommendation:
- Add a welcome bonus to incentivize sign-ups
- Reward customers for sharing their birthday (adds a personal touch and creates a recurring contact point)
Step 1 — Install the App
- Go to the Shopify App Store and install KNISTR Loyalty
- Open the app from your Shopify dashboard and approve the required permissions
- Pin the app in your left sidebar so it's always one click away
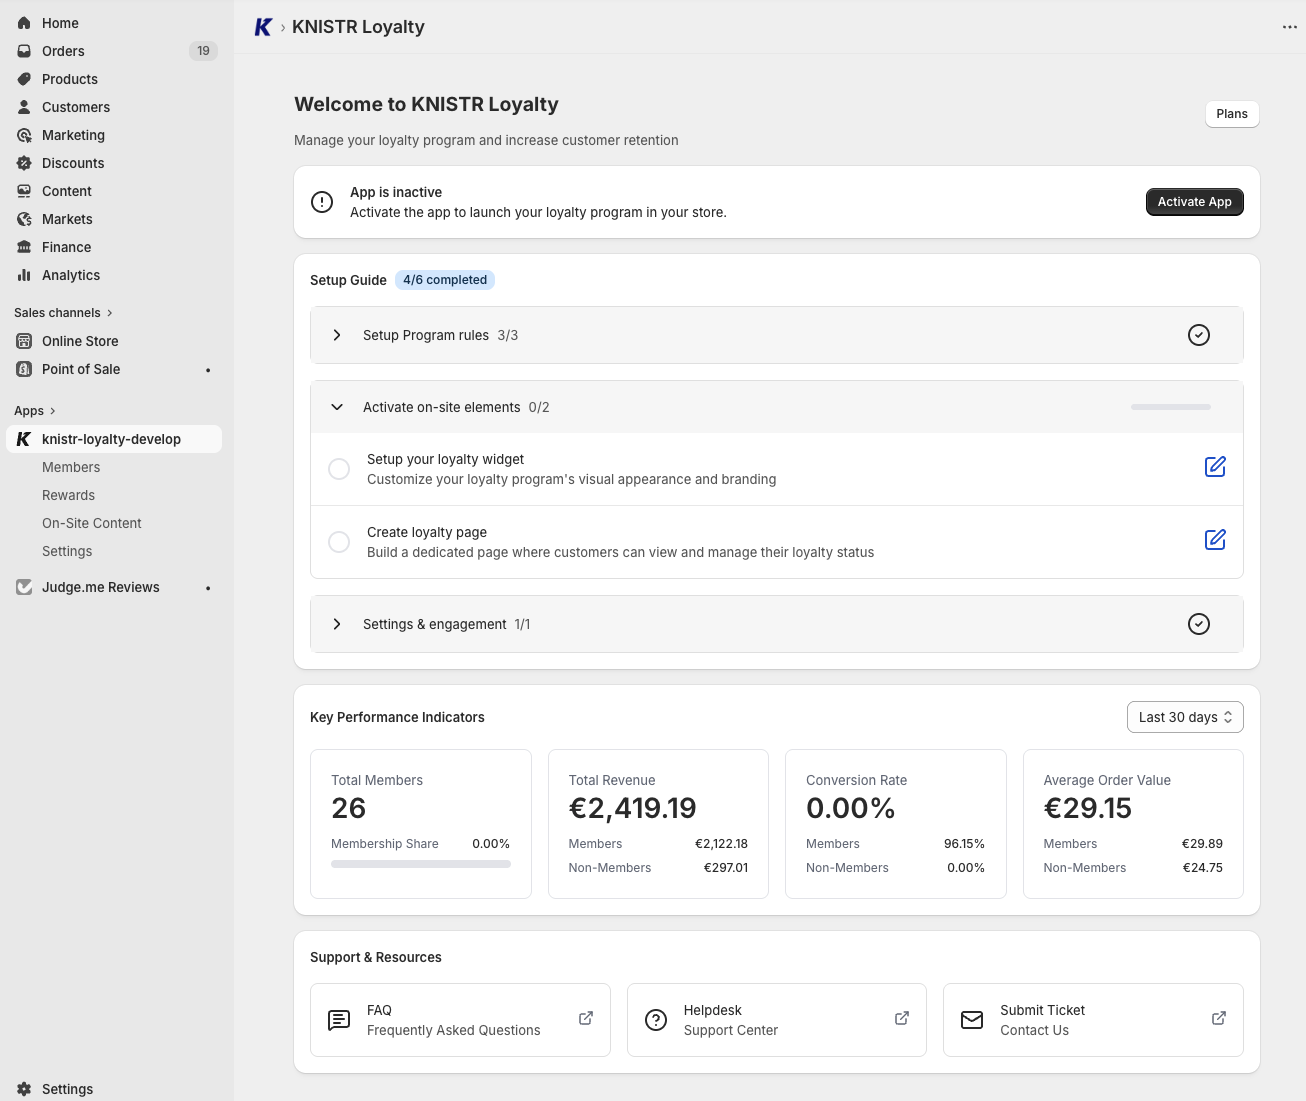
Once installed, the Dashboard gives you an overview of:
- Your setup progress
- Key performance metrics
- Help resources and documentation
Step 2 — Create Earning Rules
Earning rules define how customers collect points.
:::danger Without earning rules Customers cannot earn points — and your loyalty program cannot function. :::
Navigate to: Rewards → Earning Points
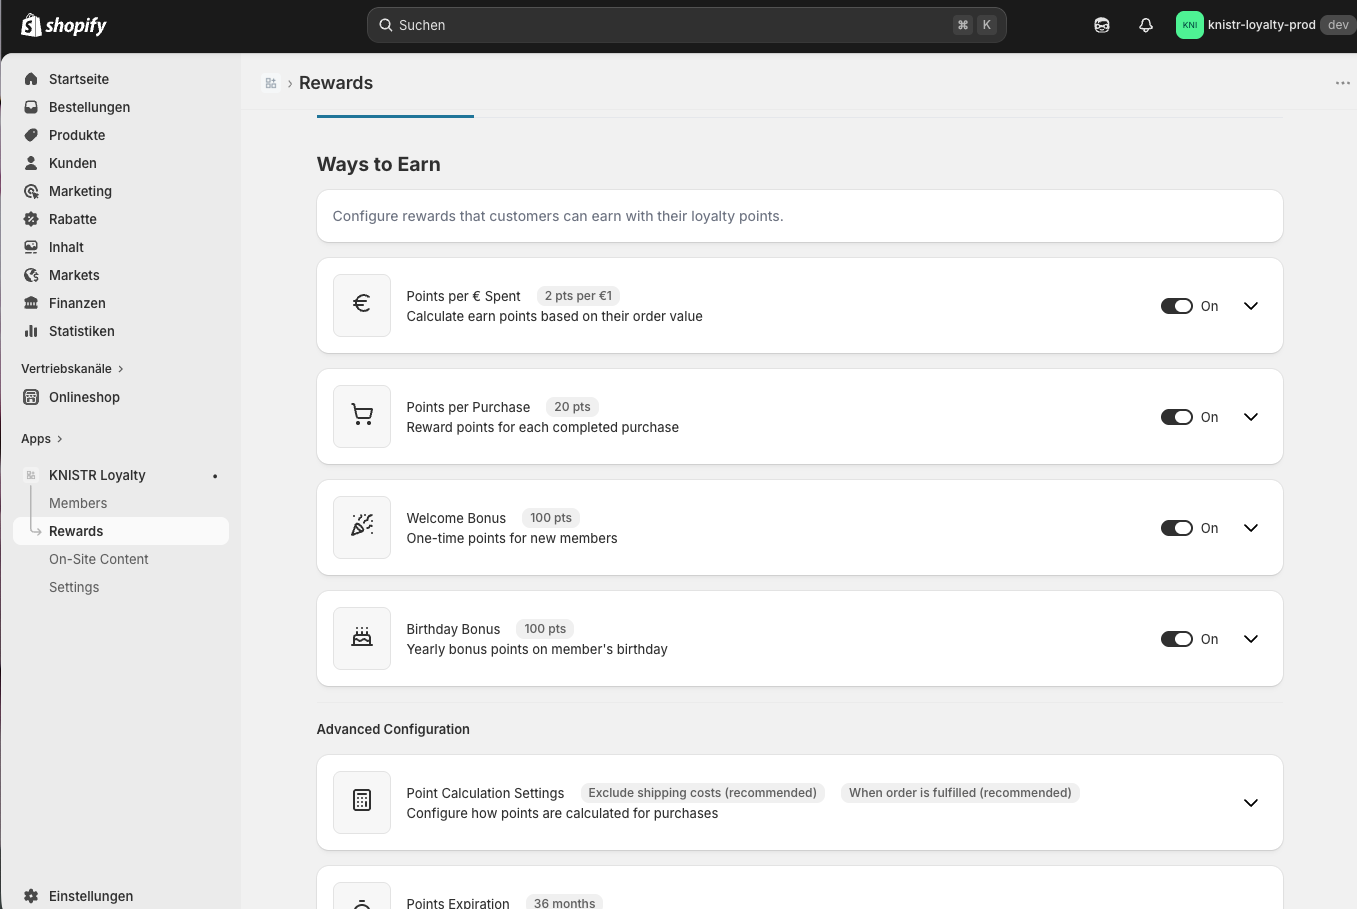
Available Earning Rules
Points per € spent (Recommended — start here)
The core mechanic of any points program. Customers earn points based on their order value.
- Suggested starting value: 1 point per €1 spent
Points per purchase (Optional)
A fixed bonus on every purchase, regardless of order size. Works well combined with "Points per € spent."
- Example: +10 bonus points per order
Welcome Bonus (Recommended)
Points awarded when a customer joins your program. Drives sign-ups and gives new members a reason to engage immediately.
- Suggested value: 100–200 points
Birthday Bonus (Optional)
Rewards customers for sharing their birthday. Gives you a recurring, personal touchpoint — and customers appreciate the acknowledgment.
Recommended Starter Setup
| Rule | Suggested Value |
|---|---|
| Points per € spent | 1 point / €1 |
| Welcome Bonus | 100 points |
:::tip Keep it simple Start with 2 rules. You can always add more once your program is live and you've seen how customers respond. :::
Step 3 — Create Rewards
Rewards define what customers get in exchange for their points.
:::danger Without rewards Points have no perceived value — customers will not engage with your program. :::
Navigate to: Rewards → Redeeming Points
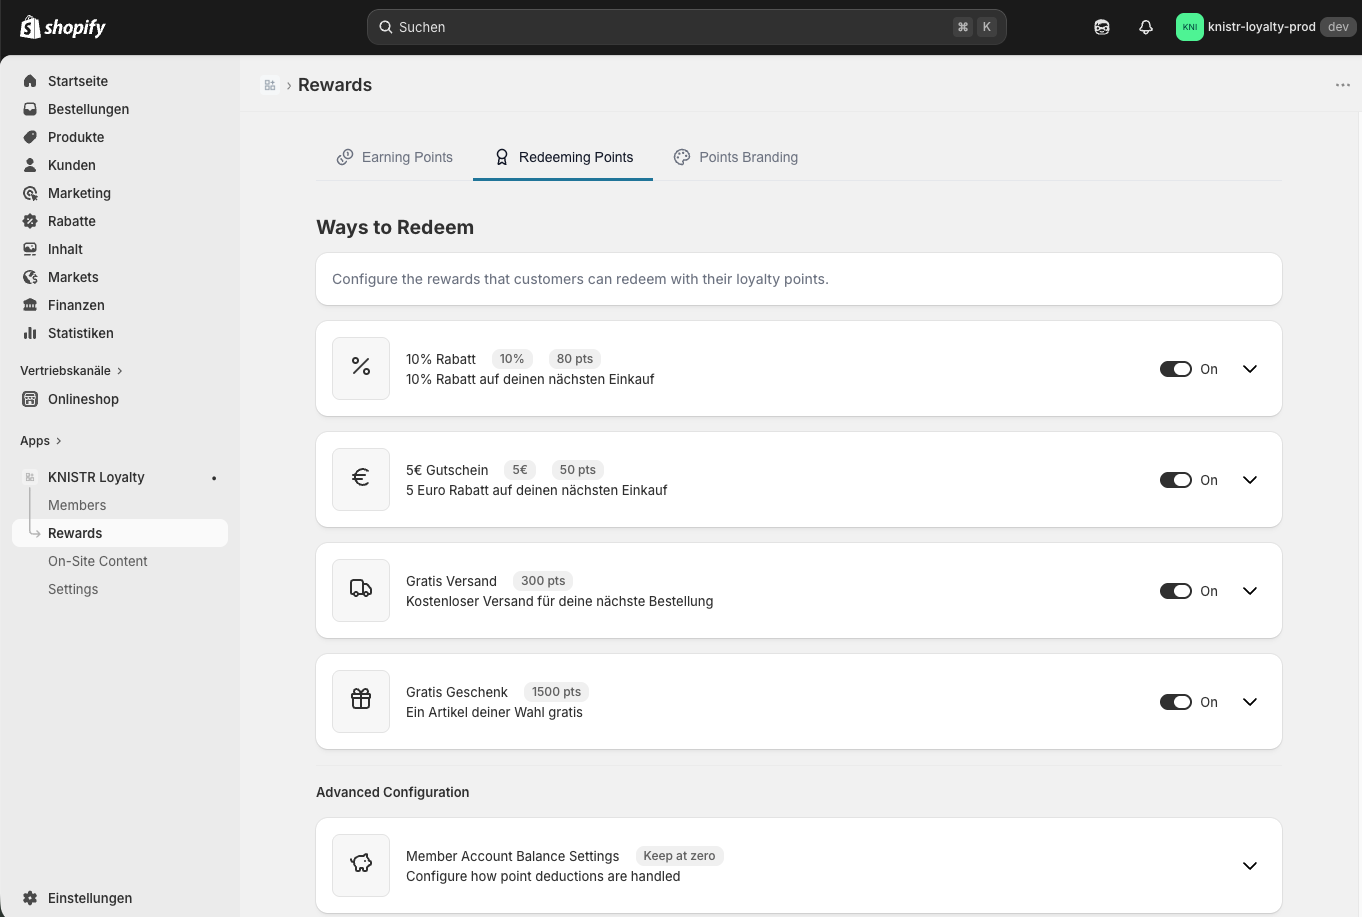
Available Reward Types
| Reward | Example | Best for |
|---|---|---|
| Percentage Discount | 10% off | Easy to understand, works for all stores |
| Fixed Discount | €10 off | Clear, tangible value |
| Free Shipping | Free delivery | Strong conversion driver |
Recommended Starter Setup
Start with one reward that feels easy to reach:
Example: 100 points = 10% off (reachable after 1–2 orders)
:::warning Common mistake: thresholds set too high If your average order value is €50 and you give 1 point per €1, a 500-point reward means ~10 purchases before any benefit. That kills engagement before it starts. Make your first reward reachable within 2–3 orders. :::
Step 4 — Customize Your Branding
Make your loyalty program feel like part of your store, not a third-party add-on.
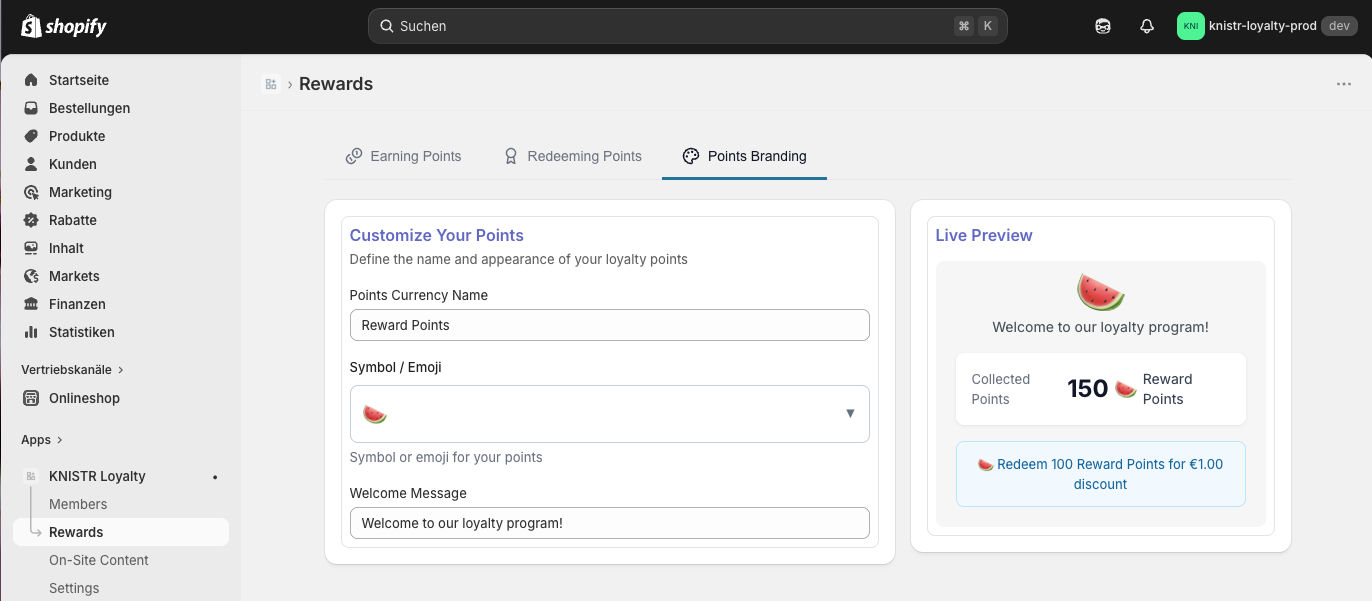
Navigate to: Rewards → Points Branding
- Rename your points: Instead of "points," try Stars, Coins, Sparks, Drops — branded names add a gamification feel that increases engagement
- Choose an emoji: A small visual touch that makes your points feel more tangible
Step 5 — Enable On-Site Content
:::warning Critical step If customers can't see your program, they won't use it. :::
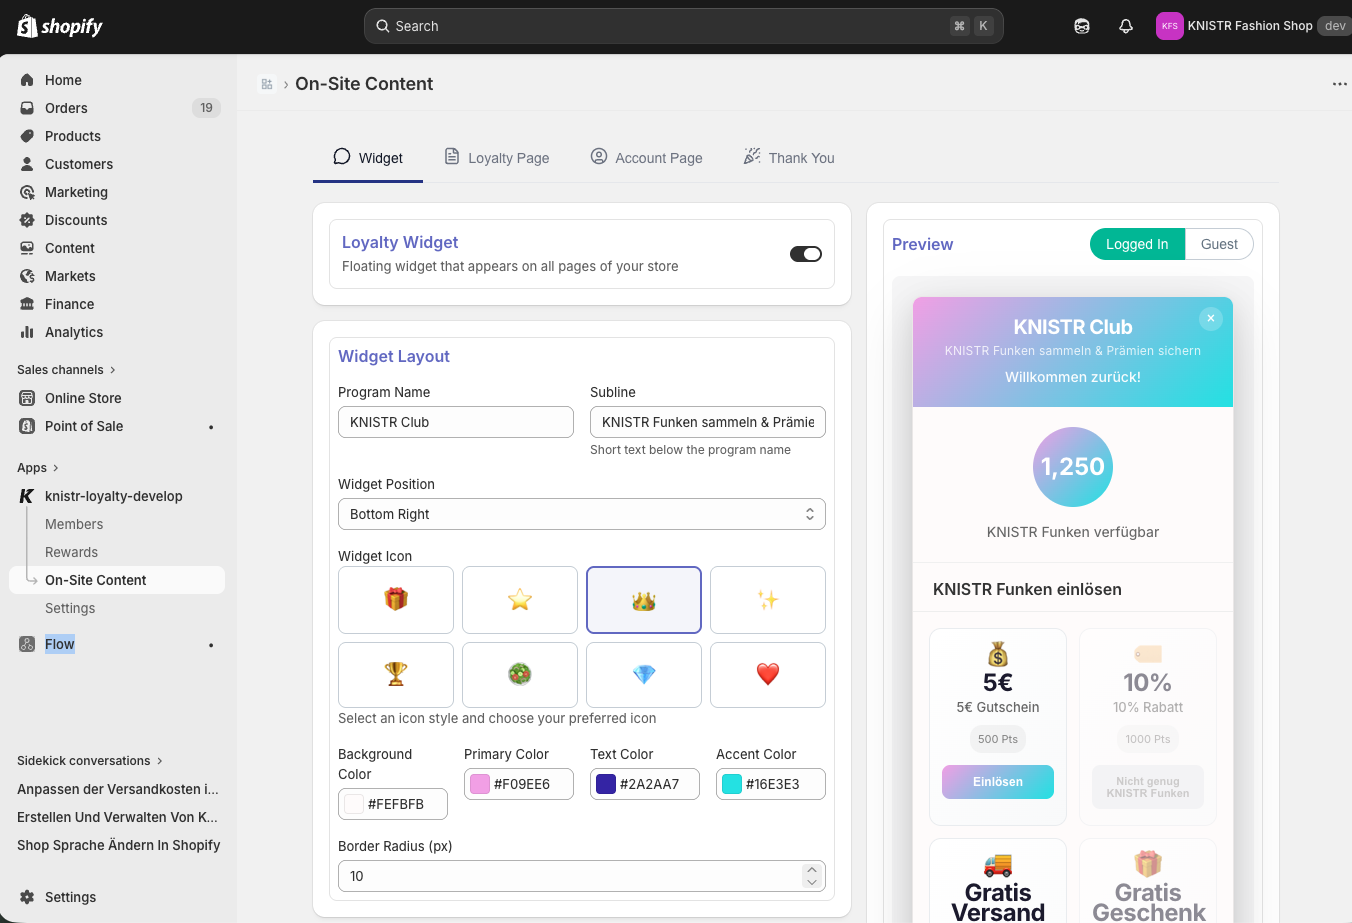
5.1 Enable the Widget
Navigate to: On-Site Content → Widget
- Toggle the widget ON
- Customize:
- Program name and subtitle
- Widget position (bottom left or bottom right)
- Colors and icon style
- Set your guest messages:
- Welcome message — shown to visitors who haven't joined yet
- Benefits overview — a short summary of why they should sign up
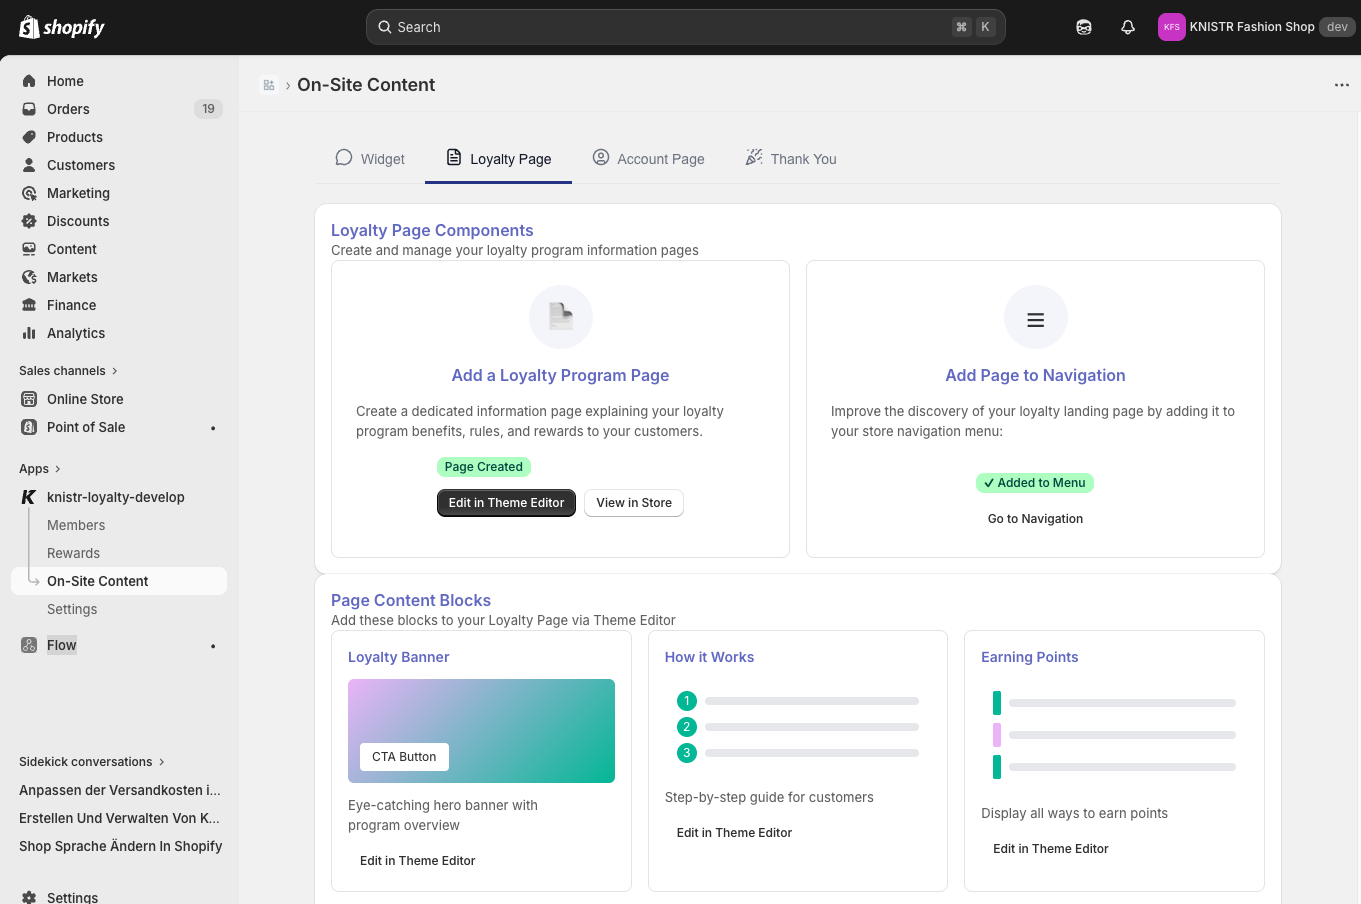
5.2 Create a Loyalty Landing Page
A dedicated loyalty page explains your program and answers customer questions before they ask.
Navigate to: On-Site Content → Loyalty Page
- Click Add Loyalty Program Page
- Use the provided content blocks to explain:
- How your program works
- How customers earn points
- What rewards are available
- Add the page to your main navigation menu so customers can find it
Step 6 — Set Up Customer Emails
Automated emails keep customers engaged between purchases and remind them they have points to spend.
Navigate to: Settings → Customer Emails

Recommended Emails to Activate
| When it sends | What to include | |
|---|---|---|
| Welcome Email | When a customer joins | Welcome bonus info, how to earn, available rewards |
| Points Earned | After a purchase | Points earned, running total, progress toward next reward |
The Points Earned email is one of the highest-engagement emails in loyalty programs. It closes the loop after a purchase and gives customers a clear reason to return.
Step 7 — Activate Your Program
Navigate to: Settings → General → set status to Enabled
Your program status is also visible on the Dashboard at any time.
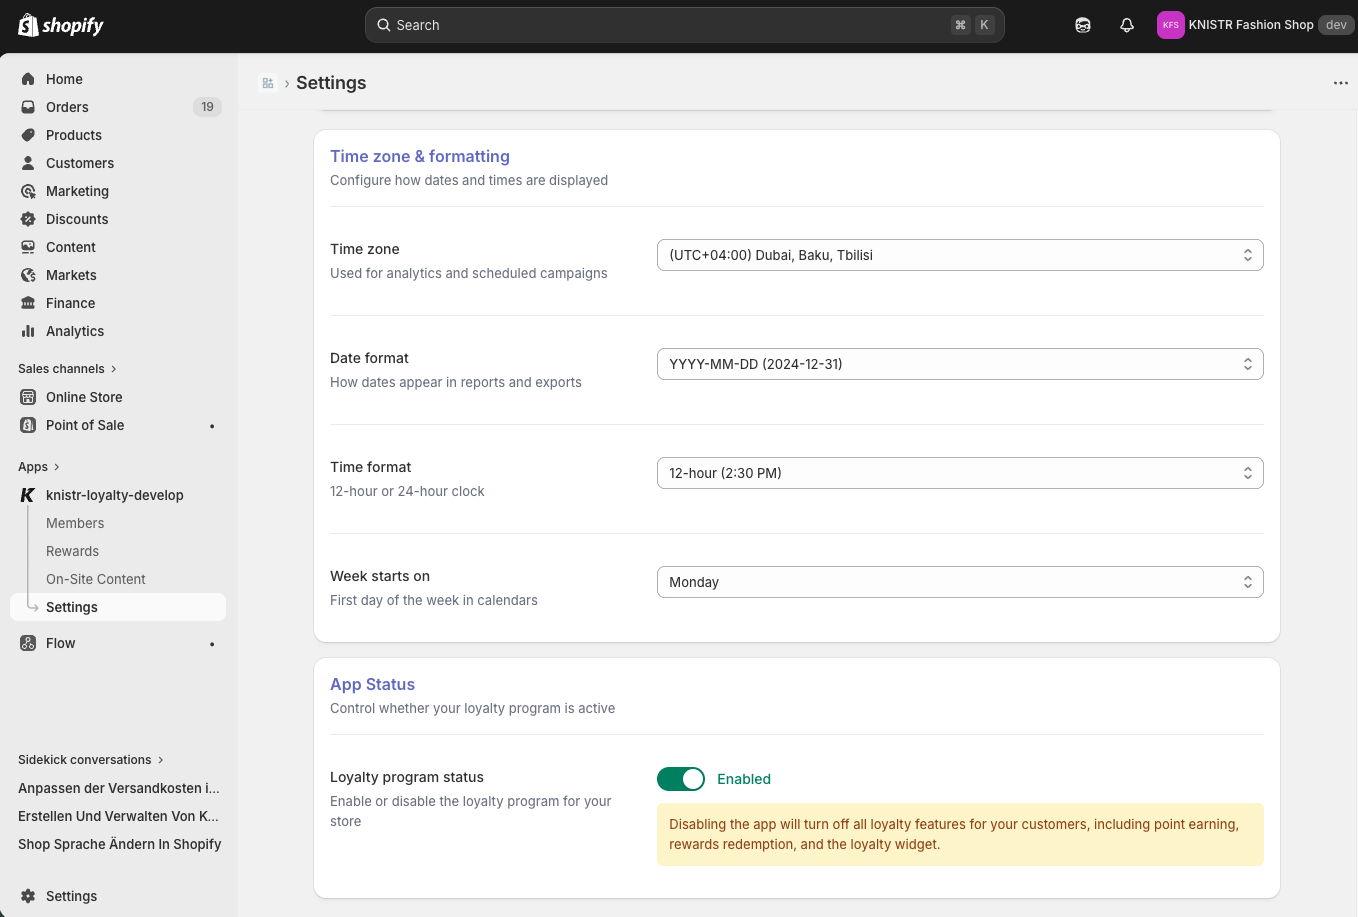
:::danger While your program is disabled
- Customers cannot earn points
- Rewards cannot be redeemed
- The widget will not appear in your store :::
Step 8 — Launch & Promote
Activation is not the same as launch. Your program needs visibility to generate results.
:::note How enrollment works KNISTR does not automatically enroll existing customers. Customers actively choose to join — which increases engagement quality, since every participant has opted in. :::
Promotion checklist:
- Add a loyalty program section to your homepage
- Highlight point-earning on product pages
- Add a post-checkout message ("You just earned X points!")
- Send a launch email to your existing customer list
- Add the loyalty page to your main navigation
- Announce the program on social media
✅ Test Before You Go Live
Run through this checklist to confirm everything works correctly:
- Place a test order → confirm points are assigned
- Check the widget appears on your storefront
- Redeem a reward → verify the discount applies correctly
- Confirm welcome and points-earned emails send correctly
What's Next?
Once your program is running, explore these topics to grow results:
| Feature | What it does |
|---|---|
| Referral bonuses | Reward customers for bringing friends |
| VIP tiers | Unlock extra perks for your best customers |
| Seasonal campaigns | Run double-points promotions |
| Analytics | Track redemption rates and identify your most loyal segments |
:::info Need help? Visit our Help Center or contact support directly from the app dashboard. :::